Introduction
If you are looking for reliable czech hedgehog plans to fabricate your own steel anti-tank barriers, you have come to the right place. The Czech hedgehog is one of the most effective and historically proven anti-vehicle obstacles ever designed. Originally used extensively during World War II, these steel structures remain in high demand today for military training, perimeter security, and historical restoration projects.
Building your own barrier from steel beams is a straightforward welding project when you have the right guidance, materials, and equipment. In this comprehensive guide, we provide detailed dimensions, material specifications, welding requirements, and step-by-step fabrication instructions. Whether you need a single barrier for a security checkpoint or multiple units for a military installation, this article covers everything you need to know about DIY hedgehog construction.
What Are Czech Hedgehog Plans?
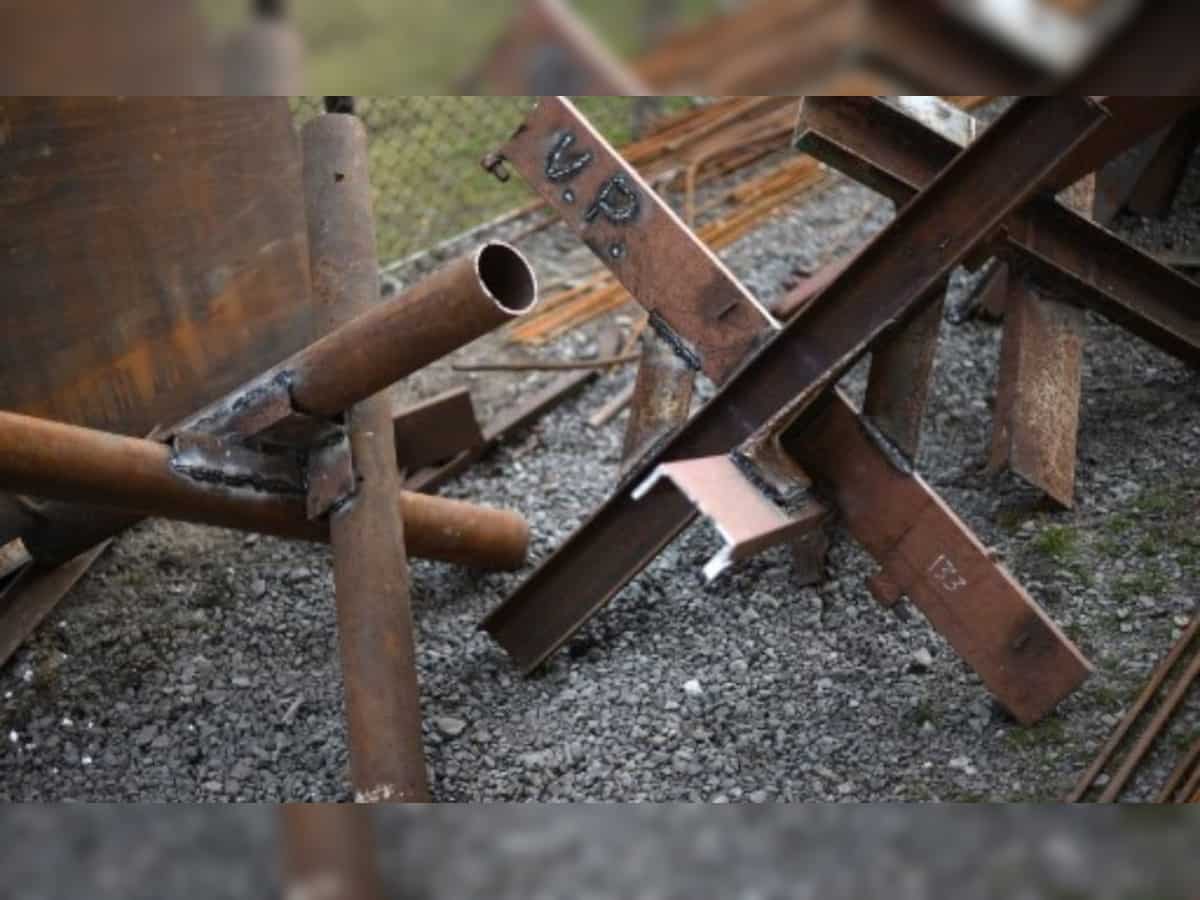
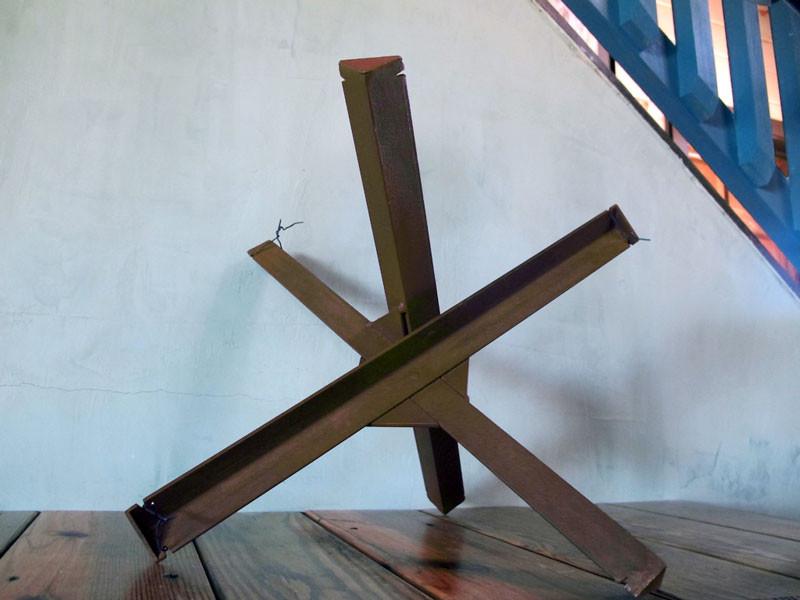
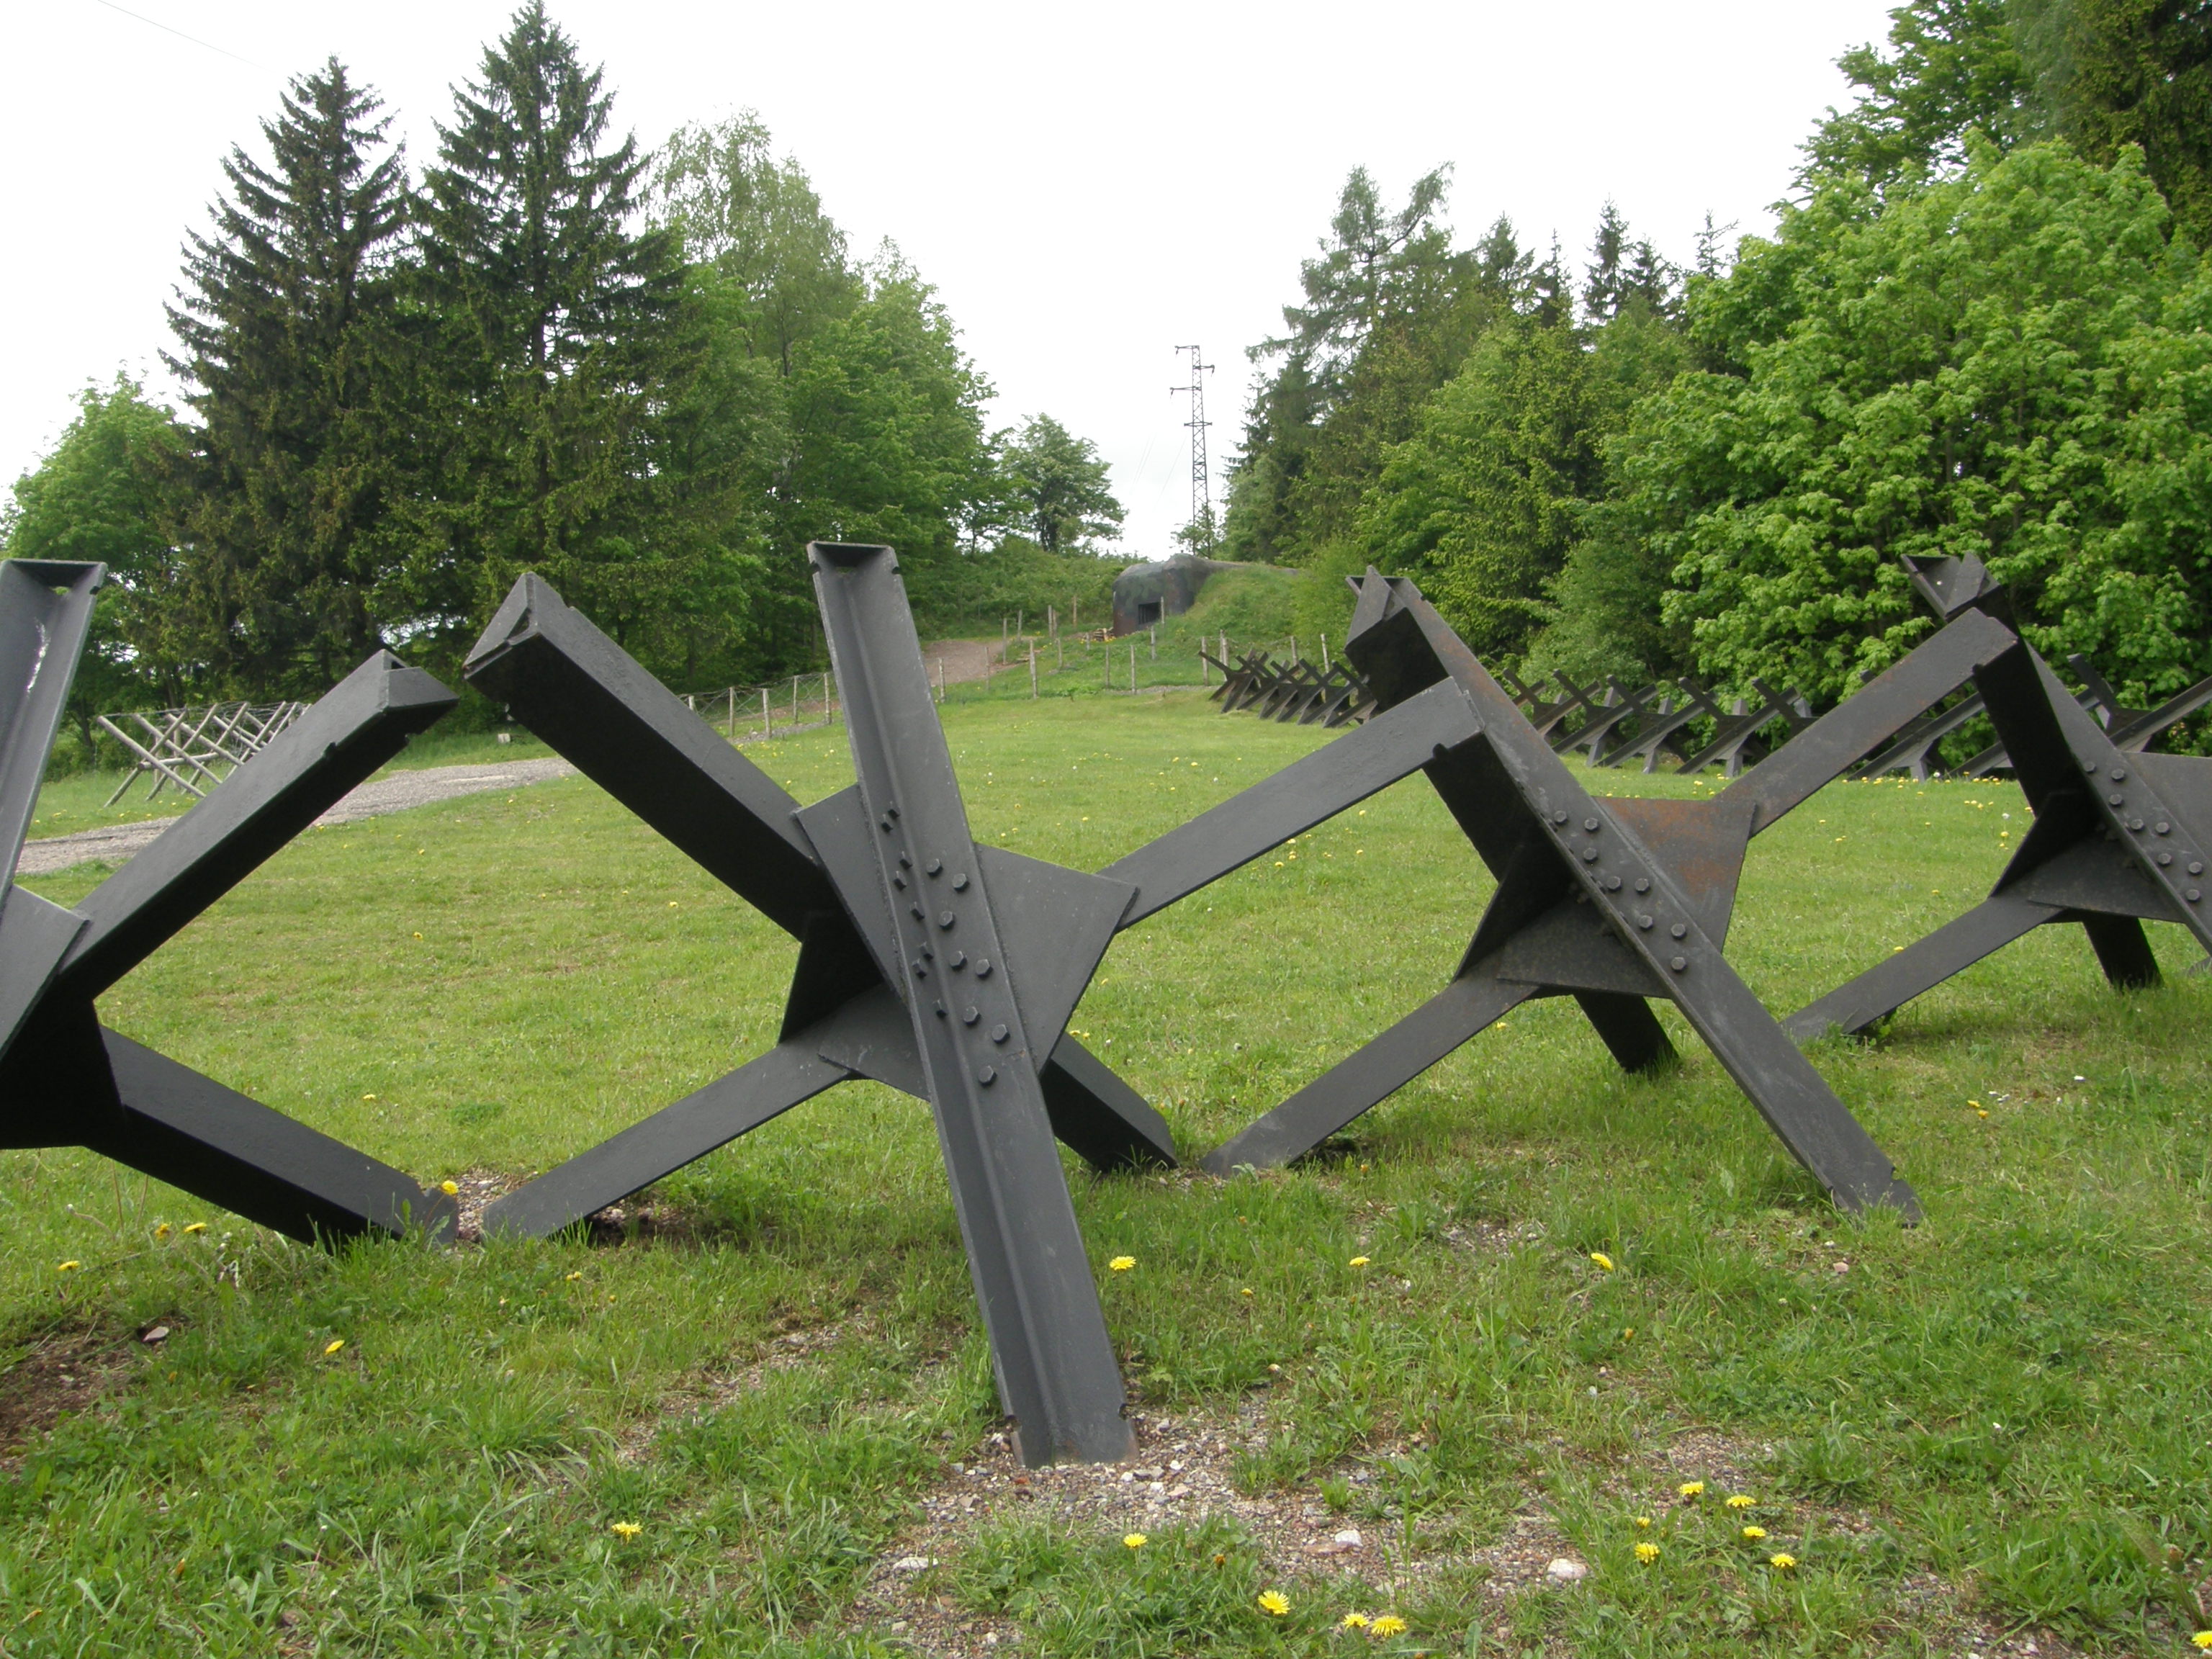
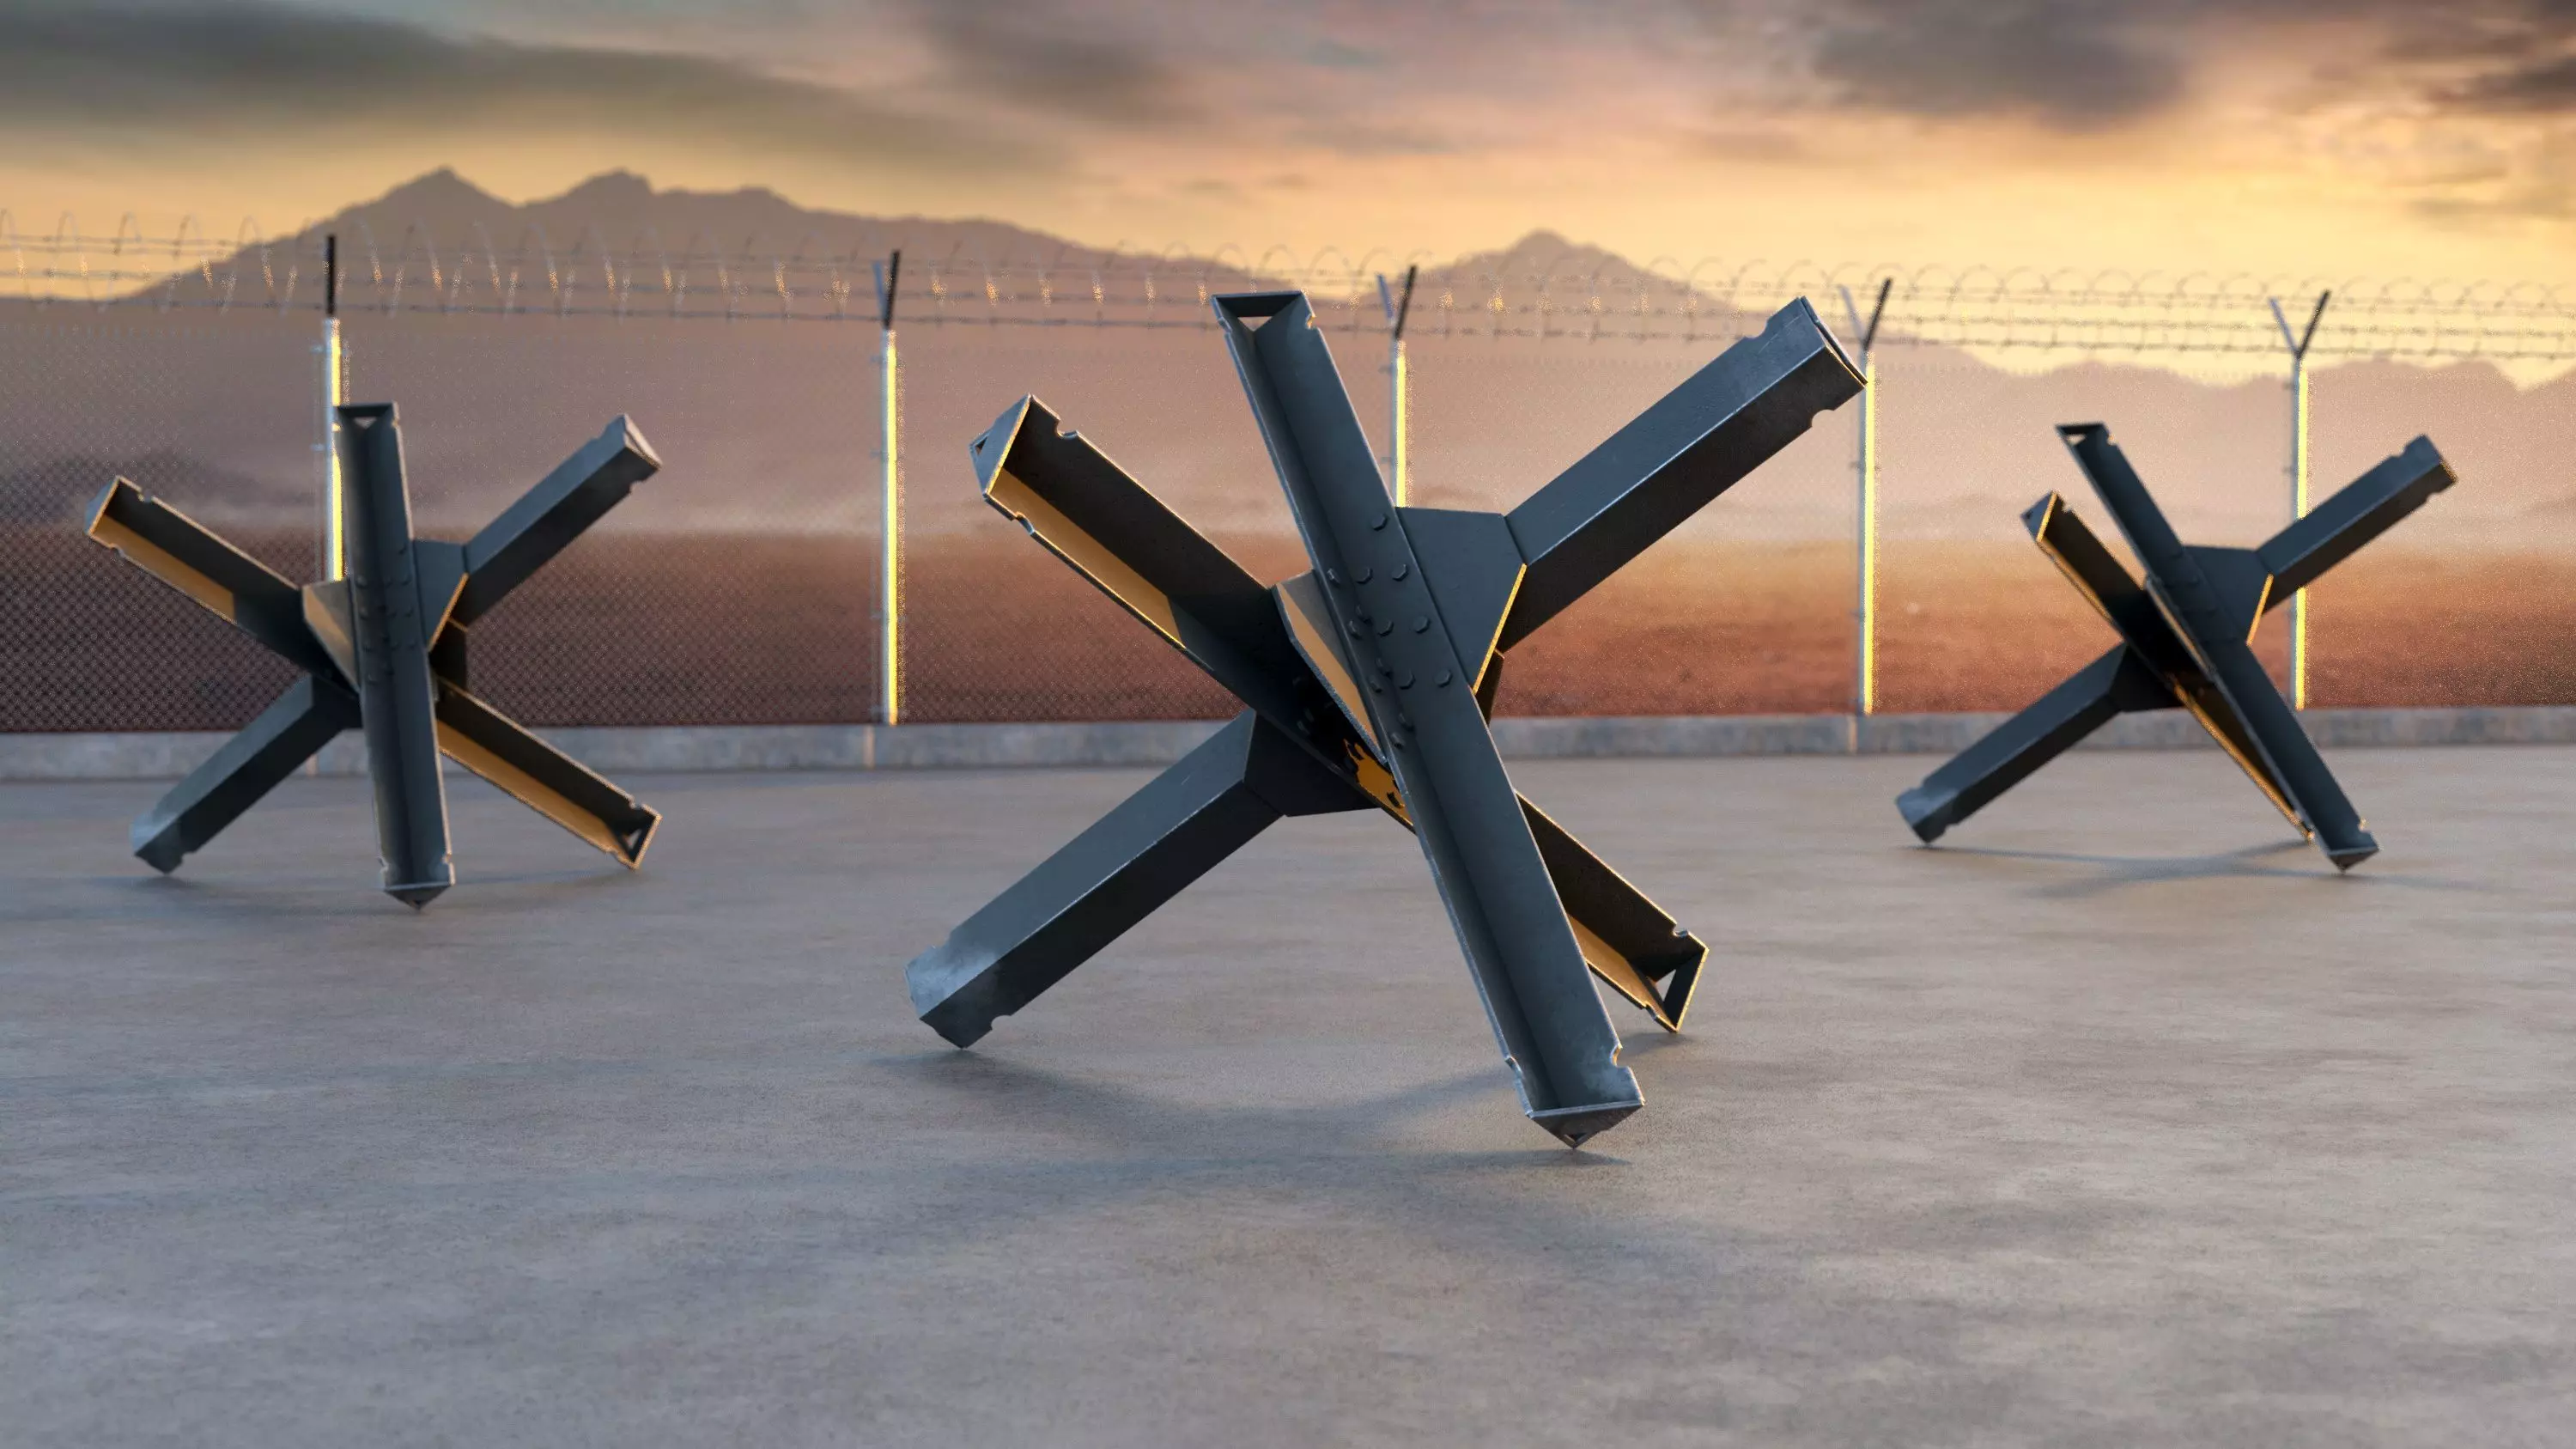
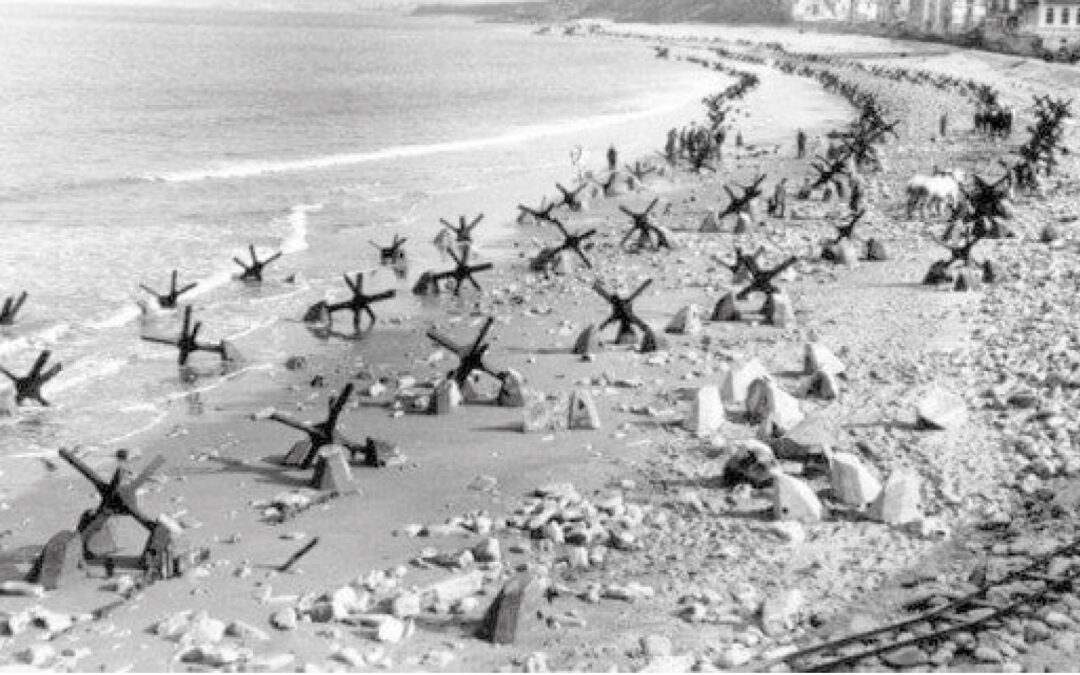
The czech hedgehog plans refer to engineering drawings and fabrication instructions for building a Czech hedgehog — a static anti-tank obstacle constructed from three steel beams or rails joined at their centers to form a three-dimensional star shape. When deployed, each hedgehog has four legs that rest on the ground while two legs point upward and outward, creating an effective barrier against vehicles and tanks.
These fabrication guides typically include:
- Dimensioned drawings showing the exact cutting lengths for each steel beam
- Welding diagrams indicating joint locations and weld specifications
- Material schedules listing the grade, size, and quantity of steel required
- Assembly instructions guiding the fabrication process from cutting to finishing
- Deployment guidelines explaining how to position and anchor the finished hedgehog
These documents are essential for ensuring each barrier meets the structural requirements needed to stop military vehicles and heavy trucks. Without accurate drawings, the fabricated hedgehog may fail under impact, creating a serious security vulnerability.
Standard Dimensions in Czech Hedgehog Plans
Standard dimensions are a critical part of any hedgehog fabrication project. While variations exist depending on the intended use, most military-grade Czech hedgehogs follow established dimensional standards that have been proven effective through decades of field use.
| Dimension | Standard Military Specification | Light-Duty Version |
|---|---|---|
| Overall height | 1,200 mm (47.2 in) | 900 mm (35.4 in) |
| Beam length (each leg) | 1,500 mm (59.1 in) | 1,100 mm (43.3 in) |
| Steel profile | HEB-140 / 6" x 6" I-beam | HEB-100 / 4" x 4" I-beam |
| Weight per unit | 180–220 kg (397–485 lbs) | 90–120 kg (198–265 lbs) |
| Footprint diameter | 1,800 mm (70.9 in) | 1,300 mm (51.2 in) |
| Steel grade | S355 JR (minimum) | S275 JR |
The most common configuration uses three 1,500 mm HEB-140 I-beams joined at their midpoints at 90-degree angles to each other. Two beams form a horizontal cross, and the third beam is attached vertically. When laid on the ground, this creates four stable ground contact points and two upward-pointing legs. Accurate fabrication drawings always specify these dimensions clearly to ensure proper construction.
For those wondering about dimensions — the answer depends on the target threat level. Military specs call for the full-size version above, while security companies often use the light-duty variant for commercial perimeter protection.
Materials Needed for Building a Czech Hedgehog
Every set of hedgehog fabrication instructions should include a complete materials list. The primary material is structural steel, but there are additional components needed for a finished installation. Here is what you will need for a single full-size hedgehog:
Steel Beams (Primary Structure)
- 3 pieces of HEB-140 I-beam (or W6x15 equivalent), each 1,500 mm long — these form the three legs of the hedgehog
- Alternative: 3 pieces of steel rail section (UIC60 or similar), each 1,500 mm long — commonly used when repurposing railway track material
- Steel grade: S355 JR minimum for military-grade obstacles; S275 JR acceptable for light-duty applications
Welding Consumables
- Structural welding electrodes: E7018 (or equivalent) 3.2 mm and 4.0 mm diameter
- MIG wire: ER70S-6, 1.0 mm diameter if using MIG welding
- Primer and paint: Anti-corrosion metal primer (zinc-rich preferred) plus weather-resistant top coat
Optional Add-Ons
- Anchor plates: 200 x 200 x 10 mm steel plates for bolting to concrete foundations
- Reflective markings: Safety-grade reflective tape for visibility at night
- Concrete base: Ready-mix concrete if permanent mounting is required
The material cost for a single DIY hedgehog typically ranges from $150 to $350 depending on local steel prices. Bulk purchasing of steel beams for multiple units can reduce per-unit costs significantly.
Tools Required for DIY Czech Hedgehog Construction
Having the correct tools is essential for a successful DIY fabrication project. Below is the equipment you will need for a safe and accurate build.
Cutting Equipment
- Plasma cutter or oxy-acetylene torch for cutting I-beams to precise lengths — a plasma cutter provides cleaner cuts with less heat-affected zone
- Angle grinder with 1 mm cutting discs and 4.5 inch grinding wheels for cleaning cut edges and beveling weld joints
- Cold saw with carbide-tipped blade (optional but recommended for square, clean cuts on smaller sections)
Welding Equipment
- MIG welder (recommended): 200+ amp capacity, suitable for 6-12 mm steel plate welding
- Stick welder (MMA): 250+ amp capacity if using electrode welding — more portable for field fabrication
- Welding helmet with auto-darkening filter (shade 10-13)
- Welding gloves, leather apron, and fire-resistant clothing
Measuring and Layout Tools
- Steel tape measure (5 m minimum) and combination square
- Protractor or angle finder for verifying 90-degree joints
- Level and straightedge for alignment during assembly
- Chalk line and metal scribe for layout marking
- Clamps: 4+ heavy-duty C-clamps (300 mm / 12 inch throat) for holding beams during welding
If you are asking about tools and materials needed for DIY Czech hedgehog construction — this list covers the essentials. Most of these items are standard in any well-equipped metal fabrication workshop. Remember to factor tool rental costs into your budget if you do not already own this equipment.
Step-by-Step Guide: How to Build a Czech Hedgehog from Steel Beams
This step-by-step guide answers the question of how to build a Czech hedgehog from steel beams. Follow these instructions carefully using your fabrication drawings for reference.
Step 1: Prepare Your Work Area
Set up a level fabrication area with adequate ventilation for welding. Position your steel beams on welding trestles or a steel workbench. Ensure you have clear access from all sides.
Step 2: Cut the Steel Beams to Length
Measure and mark each of the three I-beams to 1,500 mm (or your plan-specified length). Cut each beam squarely using a plasma cutter or oxy-acetylene torch. Grind the cut ends smooth and bevel the edges at 30 degrees where the weld joints will be made.
Step 3: Lay Out the First Two Beams
Place two beams flat on your work surface, crossing each other at their exact midpoints at a 90-degree angle. Use a protractor or square to verify the angle. The flanges of both beams should face upward in the same orientation.
Step 4: Tack-Weld the First Joint
Apply tack welds at four points around the intersection of the two beams. Check alignment again before proceeding with full welding. Any misalignment at this stage will be amplified in the final structure.
Step 5: Complete the Full Weld
Run a complete fillet weld around the joint between the two beams. Use a 6-8 mm fillet weld size with E7018 electrodes or equivalent. Weld in short segments (50-75 mm at a time) to control heat distortion. Allow the joint to cool between passes.
Step 6: Attach the Third Beam Vertically
Position the third beam so its midpoint meets the center of the cross assembly at a 90-degree vertical angle. The third beam should be perpendicular to both horizontal beams. This is the trickiest part of the assembly — use clamps and a helper to hold everything in position.
Step 7: Weld the Vertical Joint
Tack-weld the vertical beam at multiple points around the joint, then complete the full weld. Ensure complete penetration at all contact points between the three beams.
Step 8: Grind, Finish, and Paint
Grind any rough weld surfaces and sharp edges. Apply a zinc-rich primer followed by two coats of weather-resistant paint — typically olive drab, sand, or grey for military applications.
With accurate czech hedgehog plans and proper welding technique, a skilled fabricator can complete one unit in approximately 4-6 hours.
Welding Specifications for Czech Hedgehog Fabrication
Welding specifications are a crucial component of professional hedgehog fabrication guides. The structural integrity of a Czech hedgehog depends entirely on the quality of its welds, as these joints must withstand impact forces from vehicles traveling at speed. Here are the key welding requirements:
Weld Joint Design
- Joint type: Full penetration fillet weld at all beam intersections
- Weld size: Minimum 8 mm fillet leg length for HEB-140 beams; 6 mm for light-duty versions
- Weld length: Continuous weld around the entire perimeter of each beam intersection (not just tack welds)
- Weld passes: Minimum 2 passes for full penetration; 3 passes recommended for military-grade barriers
Welding Process Options
| Process | Recommended For | Parameters |
|---|---|---|
| MIG (GMAW) | Shop fabrication | 200-250A, 24-28V, 350-450 IPM wire feed, shielding gas: 75% Ar / 25% CO2 |
| Stick (SMAW) | Field fabrication | 160-200A DC for 4 mm E7018 electrode; preheat to 100°C if ambient below 5°C |
| Flux-cored (FCAW) | Outdoor fabrication | 220-280A, 26-30V, wire speed 300-400 IPM, no external shielding gas needed |
Quality Control Checks
- Visual inspection: Check for cracks, porosity, undercut, and incomplete fusion on every weld
- Dye penetrant testing: Apply to critical load-bearing welds to detect surface defects
- Dimensional check: Verify the 90-degree angles between all three beams using a protractor
- Load test: Tip the completed hedgehog onto its side and apply gradual load to verify weld strength
If you are wondering about welding specifications — the answer is yes, and they must be followed precisely. Improper welding is the most common cause of hedgehog failure and can render the barrier completely ineffective.
Where to Find Free Czech Hedgehog Plans
A common question is where to find free Czech hedgehog fabrication guides. Here are the best sources for obtaining plans at no cost or low cost:
Free Online Resources
- Military engineering manuals: Declassified US Army and NATO field manuals contain dimensioned drawings of standard Czech hedgehog designs. These are available through the Defense Technical Information Center (DTIC) and similar archives.
- Historical preservation sites: World War II museums and fortification preservation societies often publish free fabrication guides for historical reproductions.
- Metal fabrication forums: Communities like WeldingWeb and PracticalMachinist have members who share build logs with complete dimension details.
- Academic repositories: Engineering thesis papers on anti-vehicle barriers sometimes include detailed fabrication drawings in their appendices.
Commercial Plan Sources
- Security barrier manufacturers: Some suppliers provide detailed fabrication drawings with material purchase orders or as part of licensing agreements.
- Engineering consultancies: Professional engineers can produce certified designs tailored to your specific threat level requirements and local building codes.
- Online marketplaces: Platforms like Etsy and eBay occasionally list PDF plan sets from military history enthusiasts.
What to Check Before Using Free Plans
Always verify that free plans include complete dimensional specifications, material grades, weld details, and load ratings. Many free plans omit critical welding specifications or use non-standard dimensions that may not provide adequate protection. Cross-reference any free drawings against military specification documents to ensure accuracy.
Customizing Your Czech Hedgehog Design
While standard fabrication guides cover the basic design, there are several ways to customize your hedgehog for specific applications:
Size Variations
- Mini hedgehogs: 600-800 mm overall height for anti-personnel barriers or vehicle deterrence in narrow urban spaces
- Standard hedgehogs: 1,200 mm height for general military and security use against light to medium vehicles
- Heavy hedgehogs: 1,500-1,800 mm height using HEB-180 or HEB-200 beams for stopping heavy military vehicles and main battle tanks
Anchoring Options
- Free-standing: No anchoring required — relies on weight alone (180-220 kg per unit). Suitable for temporary deployment.
- Bolted base plates: Weld 200 x 200 x 10 mm base plates to the ground-contact legs and bolt to concrete foundations.
- Embedded posts: Extend one leg 300 mm below the hedgehog and embed it in a concrete footing for permanent installations.
- Interconnected chains: Weld chain attachment points to link multiple hedgehogs together for continuous barrier lines.
Surface Finishes
- Galvanized: Hot-dip galvanizing provides the best corrosion resistance for coastal or humid environments
- Powder coated: Available in RAL colors for aesthetic integration with existing security infrastructure
- Camouflage paint: Military-spec CARC (Chemical Agent Resistant Coating) for tactical applications
When customizing your design, always recalculate the weight and center of gravity. Modifications to standard hedgehog designs can affect structural performance. If in doubt, consult a structural engineer to validate your custom design.
Safety Considerations When Building Steel Hedgehogs
Fabricating steel hedgehogs involves heavy materials, high temperatures, and sharp edges. Following safety protocols is essential when working with structural steel fabrication.
Workshop Safety
- Ventilation: Weld only in well-ventilated areas or use fume extraction systems. Welding galvanized steel produces toxic zinc oxide fumes.
- Fire protection: Keep a Class D fire extinguisher (for metal fires) within reach. Remove all flammable materials from the work area.
- Personal protective equipment (PPE): Welding helmet with proper shade filter, flame-resistant clothing, welding gloves, steel-toed boots, and hearing protection for grinding operations.
Material Handling
- Manual handling: Each HEB-140 I-beam weighs approximately 45-55 kg. Use mechanical lifting aids for positioning and assembly.
- Overhead lifting: When moving completed hedgehogs (180+ kg), use an engine hoist, fork lift, or gantry crane rated for the load.
- Sharp edges: Cut steel beams have razor-sharp edges. Deburr all cut edges immediately after cutting.
Structural Safety
- Weld integrity: Never skip quality checks on welds. A weld failure during deployment could cause the hedgehog to collapse under vehicle impact.
- Stability during fabrication: Secure beams with clamps or welding magnets to prevent shifting during assembly.
- Test before deployment: Conduct a tip-test on the completed hedgehog to verify it rests stably on all four ground-contact points.
Comprehensive fabrication drawings should include a safety section. If your plans do not, add these precautions to your workflow before starting fabrication.
Cost Analysis: DIY vs. Buying Pre-Fabricated Czech Hedgehogs
When evaluating whether to build your own or purchase pre-fabricated units, you need to calculate the true cost of DIY fabrication.
| Cost Factor | DIY Fabrication | Pre-Fabricated Purchase |
|---|---|---|
| Steel materials (per unit) | $150 – $350 | Included |
| Welding consumables | $20 – $40 | Included |
| Paint and primer | $15 – $30 | Included |
| Labor (skilled welder) | $0 (self) or $200–$400 | Included |
| Tool rental / depreciation | $50 – $150 | N/A |
| Total per unit (self-welded) | $235 – $570 | $400 – $900 |
| Total per unit (hired welder) | $435 – $970 | $400 – $900 |
When DIY Makes Sense
- You already own welding equipment
- You need 10+ units (bulk material discounts make DIY more economical)
- You require custom dimensions not available from standard suppliers
- You have the workshop space and time to fabricate
When Buying Pre-Fabricated Makes Sense
- You need only 1-3 units (setup costs make DIY uneconomical)
- You lack welding skills or equipment
- The barrier must be certified or MIL-SPEC compliant
- You need delivery within days, not weeks
For those on a tight budget, quality fabrication guides combined with self-fabrication can save 30-50% compared to purchasing pre-built units. However, factor in the value of your time — each unit takes 4-6 hours for an experienced fabricator and 8-12 hours for a beginner.
Conclusion
Building your own Czech hedgehog from steel is a rewarding fabrication project that produces a highly effective, combat-proven anti-vehicle barrier. With complete fabrication guides covering dimensions, materials, welding specifications, and step-by-step assembly instructions, any competent welder can fabricate these obstacles in a standard workshop.
To summarize the key takeaways:
- Standard military-grade Czech hedgehogs use three 1,500 mm HEB-140 I-beams with full-penetration fillet welds at all joints
- Materials cost ranges from $150-$350 per unit with DIY fabrication
- Free plans are available from military archives and fabrication forums, but always verify completeness
- Welding quality is the single most critical factor determining hedgehog effectiveness
- Always follow proper safety protocols when cutting, welding, and handling heavy steel beams
Whether you are building hedgehogs for military training, perimeter security, or historical restoration, having accurate plans is the foundation of a successful project. If you prefer not to fabricate your own, we offer certified pre-fabricated Czech hedgehogs manufactured to MIL-SPEC standards. Contact our team for a quote on ready-to-deploy steel hedgehog barriers.